
Popular Articles
Midnight Purple Paint for GTR R34
2026.01.13
Exploring the Allure of Midnight Purple
2026.01.13
Benefits of Using Carbon Fiber Vinyl Wraps
2026.01.13
About Company
Colorfuul is a global leader in high-end automotive films, offering Color TPU PPF, Transparent PPF, PET Window Films, and Vinyl Wrapping. With exports to over 100 countries, we deliver consistent quality, competitive pricing, and professional service. Beyond production, we provide OEM/ODM customization, shaping the future of automotive aesthetics.
 mary@colorfuul.com
  86 13541196952
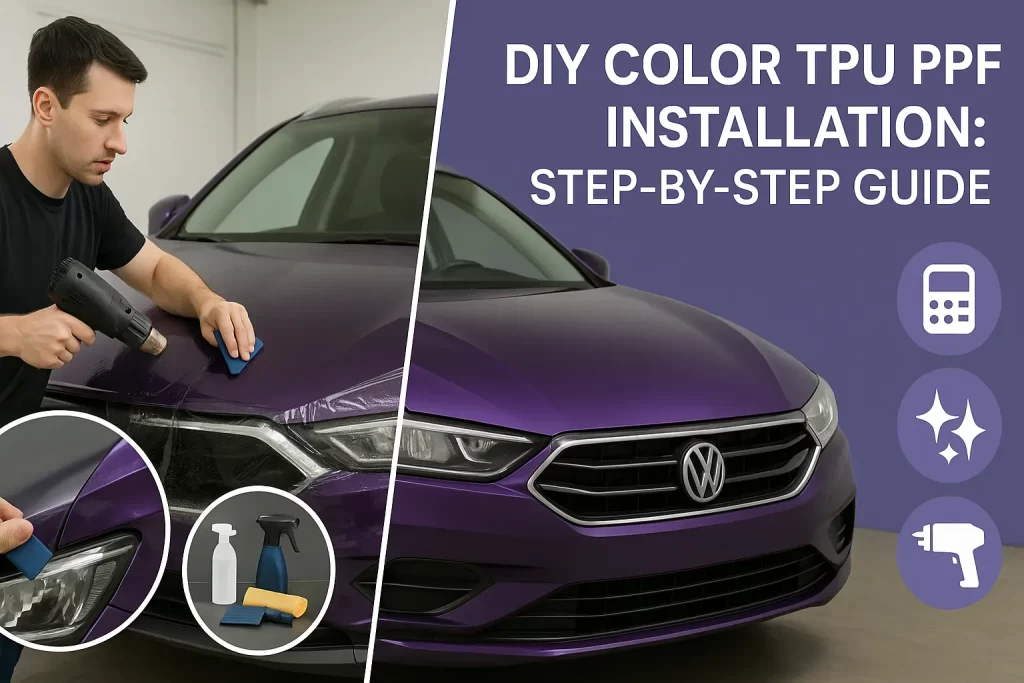
 DIY Color TPU PPF Installation: A Step-by-Step Guide
A DIY color TPU PPF installation is a topic of great interest for many hands-on vehicle enthusiasts. The idea of transforming a car's appearance and adding a durable layer of protection in one's own garage is very appealing. It seems like a way to achieve a professional result while saving on labor costs. While the spirit of do-it-yourself projects is commendable, applying color paint protection film is a task of immense difficulty. It is a craft that takes professionals years to master. This guide will walk through the steps involved, but more importantly, it will highlight the extreme challenges and common points of failure at every stage.
Before You Begin: A Word of Extreme Caution
Before a single tool is purchased or a roll of film is ordered, it is critical to understand the reality of this project. This is not comparable to changing your oil or installing a new air filter. It is more akin to rebuilding an engine or performing high-level bodywork. The margin for error is virtually zero, and the cost of mistakes is very high. A failed DIY attempt will not only look terrible but will also result in a complete waste of the expensive film material.
Why This is a Job for Experts
Professional installers are not just people who are "good with their hands." They are highly trained technicians who have invested thousands of hours in perfecting their craft. Most importantly, they have the muscle memory and tactile feel for the material that can only be developed through wrapping hundreds of cars. The nuances of how much to stretch, where to apply heat, and how to make a perfect cut are skills that cannot be learned from watching a few videos. For a detailed look at the professional option, see our guide on when to hire a pro for color PPF.
The Financial Risks of a Failed DIY Attempt
Color paint protection film is an expensive material. A roll of film for a standard-sized sedan can cost a significant amount of money. If you make a mistake on a panel, that piece of film is ruined. It cannot be lifted and reapplied. You must cut a new piece. For a beginner, it is highly likely that several panels will be ruined before one is applied semi-successfully. It is very common for a DIY enthusiast to spend more money on wasted film than it would have cost to simply pay a professional in the first place. You can learn more about the professional color PPF installation cost to make a fair comparison.
Understanding that a Warranty Requires Professional Installation
This is a critical point. All reputable PPF manufacturers will only honor their 10- or 12-year warranties if the film is installed by one of their certified installers. If you install the film yourself, the warranty is void from day one. This means if the film bubbles, peels, or fades prematurely due to a manufacturing defect, you have no recourse. The professional installation cost includes the price of this long-term peace of mind.
Here are the primary reasons to reconsider a DIY installation:
- Extreme Difficulty: The skill level required is far beyond that of most DIY projects. Even highly skilled individuals struggle without specific training.
- High Cost of Failure: The film material is expensive. Mistakes are costly and irreversible, often leading to a total financial loss.
- Voided Warranty: A DIY installation means you forfeit the manufacturer's warranty, which protects against product defects for a decade or more.
- Sub-Par Results: Even a "successful" DIY installation will almost certainly have visible flaws that detract from the vehicle's appearance.
Phase 1: Meticulous Preparation and Environment
If you are still determined to proceed, the preparation phase is the most critical. A flawless installation is impossible without a perfect environment and perfect surface preparation. Any shortcut here guarantees failure.
Creating a "Clean Room" Environment in Your Garage
Your garage must be transformed into a space that is as close to a clean room as possible. This means it must be completely free of dust, dirt, and lint. Start by thoroughly cleaning the entire garage from top to bottom. Mop the floors to prevent dust from being kicked up. Close the garage door and seal any drafts. Turn off any fans or forced-air heating that could blow dust around. The lighting must be exceptionally bright. You will need multiple, powerful light sources to illuminate every part of the vehicle.
The Essential Tools and Materials You Will Need
A successful installation requires a specific set of high-quality tools. This is not a place to save money with cheap alternatives. You will need a variety of squeegees of different sizes and hardness levels. A heat gun with variable temperature settings is also essential. A full list of the required equipment is covered in our guide to the tools for color ppf installation.
The Critical Steps of Surface Preparation
The vehicle's paint must be absolutely perfect. This is a non-negotiable step. The process involves a multi-stage decontamination wash, an iron remover treatment, and a full clay bar treatment for every square inch of the car. Any remaining surface contaminant will cause the film to fail. After decontamination, the paint must be polished to remove any swirl marks or scratches. The film will magnify any imperfection in the paint underneath. Our in-depth guide to surface prep for color PPF details this crucial process.
Choosing Your Film: Bulk vs. Pre-Cut Kits
You have two options for sourcing the film. You can buy a large roll of film, known as "bulk" film. This requires you to cut each panel's shape by hand. This method allows for edge wrapping but has a very high risk of cutting the car's paint. The other option is to buy PPF kits. These are kits where the shapes of your vehicle's panels have been pre-cut by a computer plotter. This is safer for the paint but offers less flexibility for wrapping edges and can be more difficult to align perfectly.
Phase 2: The Application Process
This is the phase where the film meets the vehicle. It is a delicate process that requires patience, a steady hand, and a deep understanding of how the material behaves. Rushing at this stage is a recipe for disaster.
Mixing Your Application Solutions (Slip and Tack)
You will need at least two different chemical solutions in your spray bottles. The first is the "slip solution." This is a mixture of water and a special soap or installation gel. This solution allows you to slide the film around on the panel to get it into the correct position. The second is the "tack solution." This is a mixture of water and isopropyl alcohol. This solution is used to neutralize the slip solution and "tack" an edge or corner of the film into place. The exact ratios for these solutions are critical.
The "Wet Application" Method Explained
Paint protection film is always installed using a "wet application." This means that both the panel and the adhesive side of the film are thoroughly sprayed with the slip solution before they touch. This creates a slippery layer that prevents the film from sticking instantly. You must be extremely careful when peeling the backing liner from the film to expose the adhesive. Any dust that lands on the adhesive at this stage is trapped forever.
Laying and Positioning the Film on a Panel
Once the film and the panel are wet, you will carefully lay the film onto the surface. This is often a two-person job for larger panels like a hood or door. You will then gently slide the film until it is perfectly aligned with the edges of the panel. This step requires a great deal of precision. For a pre-cut kit, the alignment must be perfect to within a millimeter. For a bulk installation, you need to ensure you have enough excess film on all sides for trimming.
The Art of the Squeegee: The Most Difficult Step
The squeegee process is what separates the professionals from the amateurs. The goal is to use a squeegee to push all of the slip solution out from under the film. This must be done with firm, overlapping strokes. You must work from the center of the panel outwards. Applying too little pressure will leave moisture behind, causing bubbles. Applying too much pressure can scratch or stretch the film. The squeegee must be held at the correct angle. This is a tactile skill that is almost impossible to describe in words. It must be learned through feel and experience.
Phase 3: Handling Complex Areas and Edges
Flat panels like a roof are relatively straightforward. The real difficulty lies in applying the film to the complex, curved surfaces that make up most of a modern vehicle. This is where most DIY attempts fail catastrophically.
The Challenge of Compound Curves and Bumpers
A front bumper is the ultimate test of an installer's skill. It has deep recesses, tight corners, and curves that go in multiple directions at once. Applying a single piece of film to this shape without wrinkles or "fingers" (areas where the film bunches up) is incredibly difficult. It requires a deep understanding of how to stretch and manipulate the material in three dimensions.
Techniques for Stretching and Heat Activation
To make the film conform to these complex shapes, it must be stretched. This stretching must be done evenly. At the same time, heat must be applied with a heat gun. The heat makes the TPU material more pliable and allows it to take on the new shape. The amount of heat and the amount of stretch must be perfectly balanced. Too much heat can melt the film. Too much stretch will distort the color. This process of heat activation for tpu ppf is a delicate dance.
Trimming and Tucking Edges for a Seamless Look
For a bulk installation, the excess film must be trimmed away. This is done with an extremely sharp knife. The risk of cutting through the film and into the vehicle's paint is very high for an inexperienced hand. After trimming, the edge of the film must be "tucked" into any gaps or seals to hide it from view. This requires special, non-marring plastic tools.
The Difference Between Full vs. Partial Coverage
A DIYer might be tempted to start with a partial kit, such as just the front bumper. While this uses less material, the bumper is the most difficult part of the car to wrap. A full vs partial PPF coverage decision for a DIY project is a trade-off between cost and difficulty. Neither is truly "easy."
Phase 4: Troubleshooting and Post-Installation
Even if you manage to get the film onto the car, the job is not over. The post-installation phase involves dealing with the inevitable imperfections and understanding the curing process. A DIY installation will always have flaws, and knowing how to manage them is part of the challenge.
Identifying and Dealing with Common Mistakes
A beginner will face a host of problems. These include small bubbles of water, "lift lines" from an improper squeegee motion, and "silvering" (tiny pockets of air). Our guide to common installation mistakes for color PPF provides a long list of potential issues. Some of these can be fixed, but many are permanent flaws that are the result of a lack of skill.
How to Address Bubbles, Lift Lines, and Silvering
Small bubbles of water will often evaporate through the film during the curing process. Larger bubbles may need to be carefully pushed out with a squeegee. Some installers use a fine needle to pop air bubbles, but this can damage the film. Lift lines are often permanent. Silvering can sometimes be fixed with heat. Learning how to remove bubbles from color ppf is a troubleshooting skill in itself.
The Curing Process: What to Expect
After the installation, the film needs to cure. This is when the last bits of moisture evaporate, and the adhesive sets completely. This process can take several weeks. During this time, the vehicle should not be washed. The film may look slightly hazy or have small water pockets. This is normal, but it can be a stressful waiting period for a DIYer who is unsure if they have done the job correctly.
Caring for Your Newly Installed Film
Once the film is fully cured, it must be cared for properly. This means using pH-neutral soaps and soft wash mitts. Avoid harsh chemicals and automatic car washes with brushes. The care routine is the same as for a professional installation, but any flaws in the DIY application (like lifting edges) will be weak points that require extra care.
The Reality of DIY vs. Professional Installation
It is important to have a realistic picture of what can be achieved with a DIY installation compared to a professional one. The difference in the final quality is not small; it is enormous. This is a direct reflection of the skill gap between an amateur and a professional with thousands of hours of experience.
A Realistic Look at the Expected Finish Quality
A professional installation will be nearly flawless. The edges will be invisible. The surface will be as smooth as glass. There will be no bubbles, lift lines, or trapped dirt. A DIY installation, even by a talented and patient person, will have visible flaws. There will be small specks of dust, some uneven edges, and likely some marks from the squeegee. The finish will be a "10-foot" job, meaning it looks okay from 10 feet away, but the flaws are obvious up close.
The Time Commitment: This is Not a Weekend Project
A professional team can often wrap a full car in 3 to 5 days. A single person attempting this for the first time should expect it to take much, much longer. It could easily consume several full weekends or even weeks of work. It is a grueling, physically demanding, and mentally exhausting process. Most people severely underestimate the time and patience required.
The True Cost of DIY When Factoring in Mistakes
The perceived cost saving is the main motivation for a DIY project. However, this is often a false economy. Let's say a professional installation costs a certain amount. A DIYer might spend half that on the film and tools. But if they ruin just half of the film during their learning process, they have already spent the same amount as the professional job, and they still have a flawed, amateur result to show for it.
Making the Final Decision: Should You Do It Yourself?
After understanding the immense challenges, the high risks, and the likely outcome, the decision must be made. For the vast majority of people, the answer should be a clear and resounding no. The project is simply too difficult and the financial risk is too high.
A Self-Assessment Checklist for a Potential DIYer
If you are still considering it, ask yourself these questions honestly. Do I have a perfectly clean, dust-free, and brilliantly lit indoor space? If the answer to any of these is no, you should not attempt it.
The Clear Benefits of Professional Help
A professional installer provides more than just their labor. They provide a guarantee of quality. They assume all the financial risk of material waste. These benefits are what you are paying for, and they are well worth the cost.
Final Thoughts
In conclusion, a DIY color TPU PPF installation is a project that falls into the category of "just because you can, doesn't mean you should." While this guide has outlined the steps, it has also highlighted the extreme difficulty and risk at every turn. The level of skill required is simply not attainable without years of dedicated practice. The financial risk of wasting expensive material is incredibly high. For these reasons, we must conclude by strongly recommending against a DIY approach. The best "pro tip" for achieving a consistent, flawless result is to hire a professional. This is the only way to truly protect your investment and get the beautiful, durable finish that your vehicle deserves.


